Saturday, December 8, 2012

Tomatoes...Success and Adjustments!

 This is a picture of my tomato plants from this summer.  They were HUGE!  They took over the entire bed, choking out anything I mistakenly planted alongside them.

The watermelon that was tucked in there never had a chance, there was no sunlight left for the little guy.  The pepper plants I THOUGHT I had spaced far enough away from these monsters were swallowed up!  I managed to get a decent amount off of a couple of pepper plants, but alas, most of them suffered.

What didn't suffer was my tomato crop.  I had 8 tomato plants (Tigerella and Stupice) and they yielded approximately 180 lbs of tomatoes.  I'm sad to say I actually lost the last 50 lbs worth of them, I was so terribly unprepared to handle such a harvest!  They ended up going to the chickens.


I canned over 60 pints of salsa (supplementing from the grocery store for the veggies that didn't produce or didn't produce enough!) and 18 quarts of spaghetti sauce.  Then I pureed and froze a bunch and froze some whole.  The whole tomatoes are definitely an experiment, we'll see how they go!

THIS YEAR'S SUCCESSFUL CHANGES

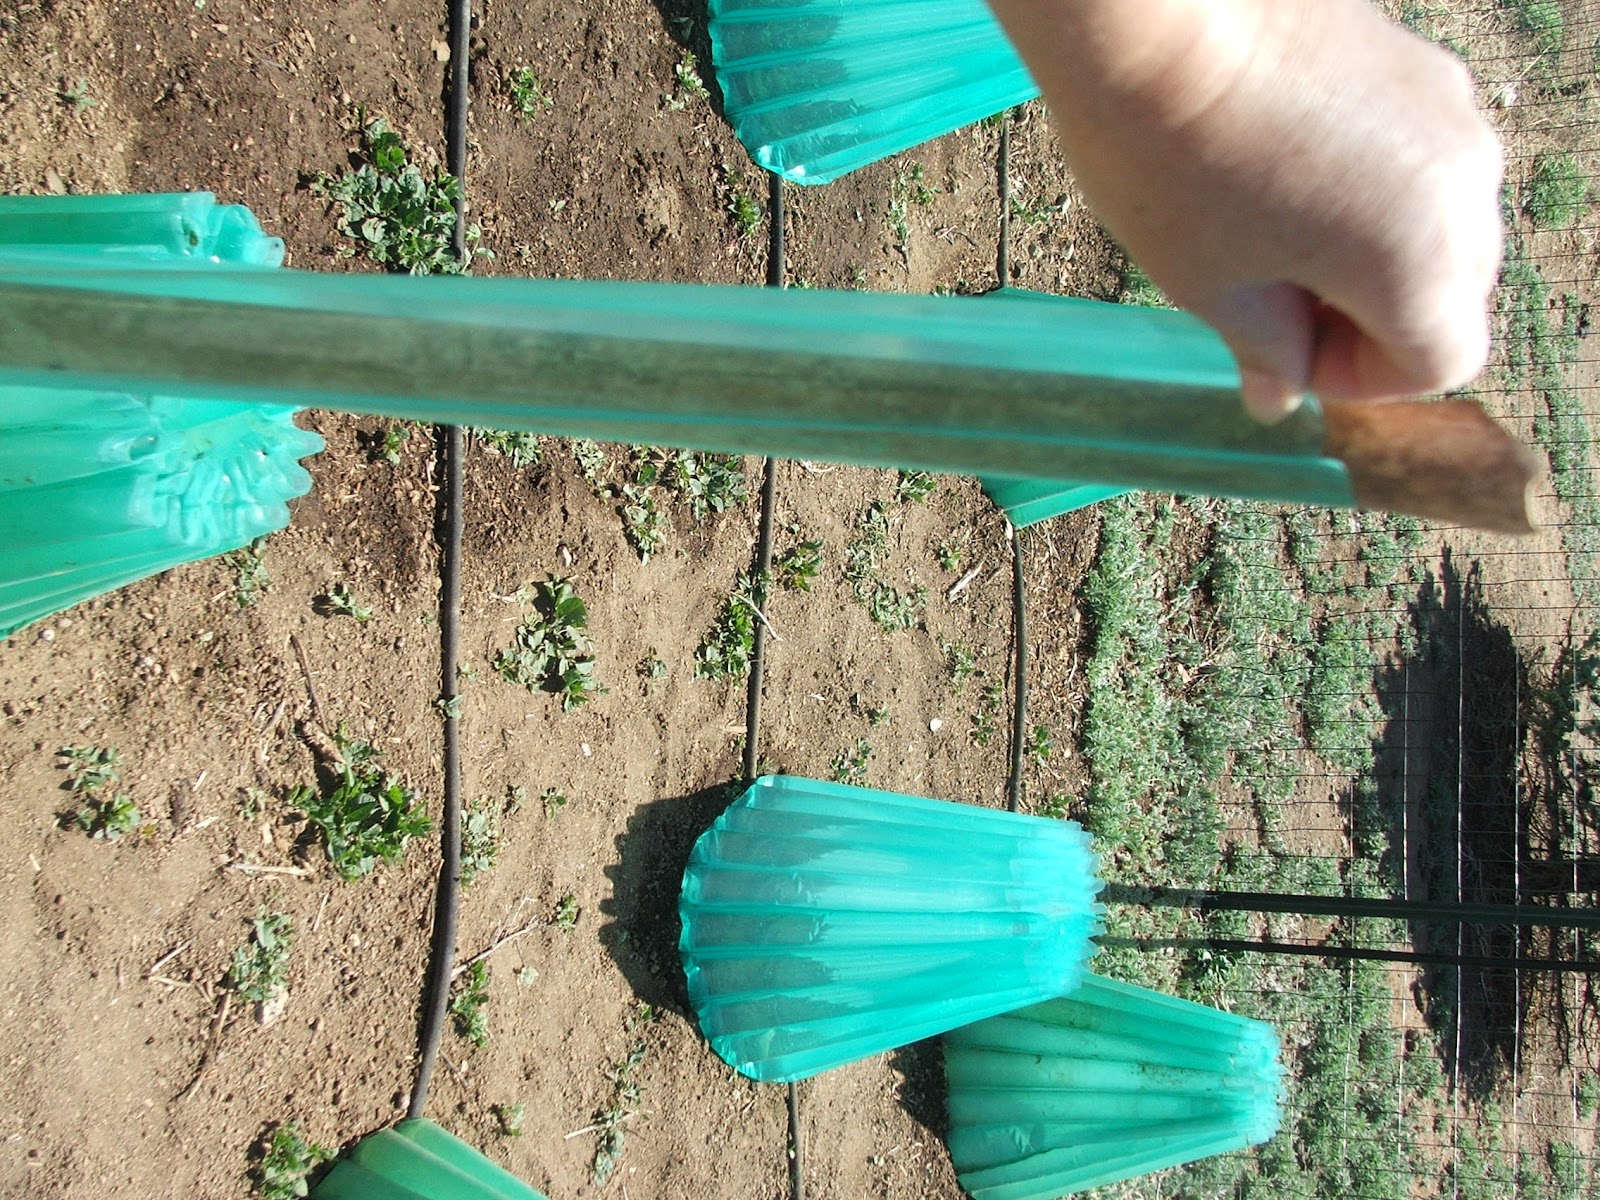
Big changes I made to my tomato bed this year were heat retention and wind reduction.  After learning that tomatoes prefer a temperature of 55-85 degrees night and day and that they didn't like wind, I nearly gave up!  But some great suggestions from a Master Gardener in my area got me going again.  My husband built me a four foot wall around 2 sides of the bed out of excess metal siding we had (which actually helped on both temp and wind counts) and every tomato plant was left in their "Wall-o-Water" until harvest was complete.  

Even watering by way of soaker hose helped reduce and nearly eliminate the blossom rot I had been experiencing.  But the large harvest of vine ripened tomatoes I credit to mitigating the wind/heat factors.

CHANGES FOR NEXT SEASON

Next year, the 2 sided wall will be completed to fully encase the 8' x 25' bed.  The further away from the wall the plants were, the less successful they appeared.  We'll also be switching to a drip system instead of soaker hoses, to reduce water loss during delivery.  I have also been tilling compost and crushed eggshells into the bed to provide more nutrients for the plants.  
The last big change will be in fruit types.  While I loved the success of the Stupice and Tigerella tomatoes, I want to expand to include a Roma-type tomato and a cherry-type.  Hopefully, this will help me to better utilize my crop and reduce losses at the end of the season when everything comes off at once in an attempt to save the fruit from frost!

Tomatoes have been my biggest challenge yet up here.  Short growing season, windy and cool conditions, and poor native soil were all working against me. I was so very thankful for the guiding advice I received!  Growing a plant that was meant for a temperate climate in a mountainous one can be challenging...but it doesn't have to be impossible!

Next challenge...better potato yields! ;-)

Monday, July 2, 2012

Baby Garden!

The monsoons haven't hit yet...so we're still at baby garden stage.  As I type, I can smell rain, so it'll be soon!  Every time they hit, the garden goes crazy!  The setup and planting stage of gardening is so very time consuming...it's very exciting to be nearly done, so that the growing and picking can begin.

This year, we're trying out semi-permanent beds. The setup allows us to decide in advance which beds will house which crops, so that fertilization/layout/watering can all be looked at.  This year, we staked them out and added wood chips in the walkways to help define them.  The wooden stakes turned out to be really useful in keeping long hoses in the walkways and off of delicate plants.  As the hoses get pulled around, they catch on the stakes and it has helped direct them.


Here's the newly replanted (ahem) carrots and greens bed...I planted the darned thing three weeks ago...and I  got three whole chard plants to sprout.  UGH!  So, apparently, carrots don't appreciate light hand-watering...at least in my soil.  So, this time I've got soaker hoses down for slow watering that won't wash the seeds away.  Really hoping this works as well as the last two years.  I've got some Cosmic Purple carrots in there, along with Nantes and some Chantenay.  Yum! C'mon babies, sprout!


Here's the three types of corn we're growing.  You can see the woodchip walkways.  The watering for the corn and beans are soaker hoses coming off of pvc manifolds.  It allows one hose to water 8-25 ft rows at a time.  Very helpful when attempting to water AND manage three kids, ha!  The far back corn was planted three weeks before the corn in the foreground.  At the back is blue drying corn and popcorn, the front is sweet corn.  There is also some drying beans in the back of the picture.  The fifth wheel, sadly...is on the neighbor's property...


Here is the tomato/pepper bed.  The metal wall is to minimize the wind on the plants and increase the heat.  The wall-o-waters will help hold in heat too...let's hope this helps the plants set fruit!  I was completely caught off guard with how quickly the plants grew this season, and really missed the good window on adding tomato cages within the wall-o-waters.  I'll post pics later of the after, but squeezing the plants into the cages was something like wrestling an octopus into a sweater, yikes.

Very excited to see what happens when the rain arrives.  Lots of expectations for this garden!

Healthier Chocolate Chip Cookies


YUM! I love chocolate chip cookies...but they and my current weight-loss plan don't play nicely together.  Also, I don't want to feed my kids a ton of sugar, thus- healthier chocolate chip cookies.  They don't taste the same as regular ones, and they're not exactly health food.  But they're sweet enough to kill my cravings for a treat and don't make me feel like an extra workout at the gym is necessary!

I based the recipe on the one in my Betty Crocker cookbook...then ad libbed until it looked right.  The original had a total of 2 cups of sugar (1 white, 1 brown- which is white+molasses), 1 cup of butter/margarine, white flour, no flaxseed, and 2 c of chocolate chips.   Here's what I came up with:

1/2 c melted raw honey
1/2 c packed organic brown sugar
1 c unsweetened applesauce
1 large egg
3 1/2 c whole wheat flour (I used soft winter wheat, for those of you grinding your own)
1/4 c organic ground flaxseed
1 tsp Rumford's Baking Powder (aluminum-free)
1/2 tsp Redmond's RealSalt
3/4 c chocolate chips

Mix the honey, brown sugar, applesauce and egg together.  If you're using melted honey that's still a little warm, wait to add it until after the flour is in, so you don't cook the egg.  Add flour, flaxseed, baking powder, and salt.  You may need less flour at lower elevations or if you've used regular honey...make sure the dough is stiff without being overly dry.

Line cookie sheets with parchment paper (or spray oil would probably work too, but I used parchment paper today).  Scoop the dough out into the cookie size you desire and bake at 375 for 10-15 minutes until just starting to brown on top and cookies don't dent when pressed lightly with a fingertip.

Allow to cool, then place in a high location so your kids don't scarf them all in the next ten minutes! ;-)

Enjoy!

Monday, May 21, 2012

Granola Energy Bites

 This is a really easy recipe I found on The Marathon Mom 's blogsite.  She's got a much better pic of the end product...my batteries were dead on my camera, so all my pics came from my phone. Sorry!  Start out with 2 cups of oats and toss them in a large mixing bowl (you'll need the room to smush it all together in the end!)


 Have your lovely (little) assistant help by adding in 2 cups of coconut flakes and 1 cup ground flaxseed.


 Now, 1 cup of chocolate chips (I used semi-sweet, but you could probably sub in any kind you like!)


 Ok, lovely assistant, now gently pour in 1 tsp cinnamon.


 Now, gently stir it all to combine...


 Next, add in 2 tsp vanilla and 1 cup peanut butter (or sunbutter/other nut butter).


 Add in 2/3 cup of honey (I used raw, but regular would work just fine!).


 Here's the fun part.  Smush it all together to mix well.  You can use a spoon, but bare hands really work better to evenly distribute the peanut butter and honey.


Then, form them into balls of whatever size you like and store them (covered) in the fridge.  I ended up with about 4 doz small-ish bites.  My kids are younger and it's easier for them to eat.  (Don't try to count them from the picture....not all of them made it to the fridge, lol...yum!)  Check out the blog linked above, the commenters really played with this recipe and have several variations that sound so good!

Here it is a little more consolidated:

Granola Energy Bites

2 cups oats
2 cups coconut flakes
1 cup ground flaxseed
1 cup chocolate chips
1 cup peanut butter
2/3 cup honey
2 tsp vanilla
1 tsp cinnamon

Mix all dry ingredients in a large mixing bowl.  Add in wet ingredients and smush (that's a technical term!) to completely combine.  Shape into balls and store, covered, in the fridge.

Thursday, May 17, 2012

Fixing a leaking "Wall-O-Water"

 So here is my beautiful bed of set-up Wall-O-Waters!  Except that some of them have been with me for a while and are not looking so beautiful anymore...these things happen as we age.  Some of us need a little more primping in the morning.  Wall-O-Waters need repair kits!


 My son insisted on posing with this picture, crazy hair and all :-).  But you can see how this particular Wall-O-Water is leaning a little bit to the right.  Since it's not doing the "Hokey-Pokey" we can assume one of the tubes is not fully filled with water.  Here's where the repair kit comes in.


 I bought these at the same gardening supply store where I purchased the new Wall-O-Waters I needed this year.  Some are just beyond repair after 7 years!  The process is fairly simple.  Decide which tube is the culprit and pull out a repair sleeve.


 I found a short piece of fairly narrow PVC pipe to insert mine with.  I put the pipe inside the entire length of the repair sleeve... (My apologies, I couldn't figure out how to flip the silly picture!)


 And then pushed the sleeve down into the leaking tube.


 Ta-da! You can see, I'll need a couple to fix this one.


 Remove the PVC (or whatever implement works for you, careful that it doesn't have any sharp points!)


 And fill the newly repaired tube with water.


 Works like a charm!


And now it's ready for my beautiful seedlings!  Hope this was helpful to someone.  This is the first year I've buckled down and repaired my older "waters".  It really was simple and quick and it saved a few bucks.  Enjoy your gardens!

Sunday, May 6, 2012

Sleeping Babies

Does any other parent have my obsession with photographing your sleeping children?  I can't seem to help myself...they're just so darned cute...and funny...and cute!  Some days it seems to be the only photo I can snap of them that isn't just a big blur.
There's always the classic sleeping newborn.  So sweet, so small and pink...and squishy.  Sorry, I'll stop :-)
You've got the funny pet-involved photo...


 The mid-action shot...

 This little gal shopped 'til she dropped...


 And partied-hardie...


To tired to even finish his supper.

In the end, I think it's just my attempt (as the parent of three) to hold onto every snippet, every morsel of their childhood.  To remember every adorable, silly, wacky, beautiful look on their little faces.  To attempt to freeze time.  To capture the feeling of small feet running the floor in our house, little fingers smudging the glass, and tiny arms hugging my leg.  It doesn't work, but it helps me remember.

Friday, May 4, 2012

Garden Time!

 It was a little chilly that day, so we bundled up with the froggy hat and baby backpack and headed out.


 Watered the strawberry plants.  They're still so small, but trying bravely to come back from winter and pregnant momma's neglect last summer.


 Sunflowers are starting to poke thru!  Giant Grey...should be tall and beautiful soon.


 This is a bareroot rhubarb plant.  The part that had sprouted while it was in my kitchen has died back, but a new sprout is emerging.  No harvesting this year, gotta let those roots set up!


 Baby Kale!  They're still so tiny, but I can already taste the kale chips.  Yummmmmmyy...


 This is my tomato/pepper bed.  My little helper was out assisting me in laying out the soaker hoses for watering.  The bricks are just for weight until they settle.  They weren't used last year and have been all coiled up, so they really didn't want to behave and lay straight for me just quite yet.


 Here's the start of setting up the Wall-O-Waters.  Set down a five gallon bucket (upside down and over the plant if you planted first, I'm pre-warming the soil so there's no plant yet).


 Pop your Wall-O-Water around the bucket and begin to fill each tube like you would tighten a tire's lug nuts.  12-6-9-3, etc until filled.


 Here's what it'll look like when you're done filling.  Lovely.


 Slide the bucket out carefully, and straighten it up, if needed.


The tops will tend to collapse in a bit, giving it a "tepee" look.  Perfect! It'll be ready in no time for my little seedlings, with a mini-greenhouse for each one!  Now, only 18 more to go...

Tuesday, May 1, 2012

Fancy Grilled Cheese Sandwiches


Grab your ingredients, it's gonna be yummy!  You'll need some good whole grain bread, raspberry preserves, thinly sliced pear, sliced muenster cheese, and a little cooking spray.  Ready?


 Spread both slices of bread with raspberry jam, pile on the cheese and pear slices, then pop the other slice on top (jam to the inside!).  Spray your warm pan and place your delicious-to-be creation in it.


 Use some top weight to get the sandwich warm enough to melt the cheese, I just use a plate to be simple.


 Flip it over when it's nice and toasted (I'd keep your heat to med-high, so the pear and cheese can warm all the way thru before you incinerate the bread).


Using a spatula, remove sandwich to serving plate and slice in half (well, you don't HAVE to, but it looks so pretty...).  And, EAT! (You probably didn't need me to tell you that ;-)

This sandwich is a healthier version of the Bacon, Pear, and Raspberry Grilled Cheese from the Tasty Kitchen website.  I didn't actually MEAN to make it healthier, per se, I just forgot in the rush to get dinner on the table to add the bacon inside and the butter on the outside.  But 'cha know what?  Everyone liked it, kids included!  So there ya go, forgetting can be healthy for you! Enjoy!

Monday, April 30, 2012

Kale Chips

Kale washed, dried, and chopped

Kale Chips ready to be tasted!

I made kale chips tonight for a snack, so yummy!  Much better than the other concoctions I probably would've come up with after the kids went to bed, haha.  They're very simple to make.  The recipe I use is a spin-off from my friend's recipe at her blogsite All About Home.

The recipe is simple, here are the ingredients:

1 bunch kale
Cooking spray
2-3 pinches of Redmond's Real Salt

1- Wash and dry the kale, chop or tear into bite-sized pieces (I prefer to remove the stems).
2- Spray a cookie sheet with cooking spray, then spread the leaves out evenly.
3- Spray the leaf bites with cooking spray and lightly salt them.
4- Bake at 350 for about 10-12 min or until crispy.
ENJOY!

Note- My kids love and fight over these things, really!